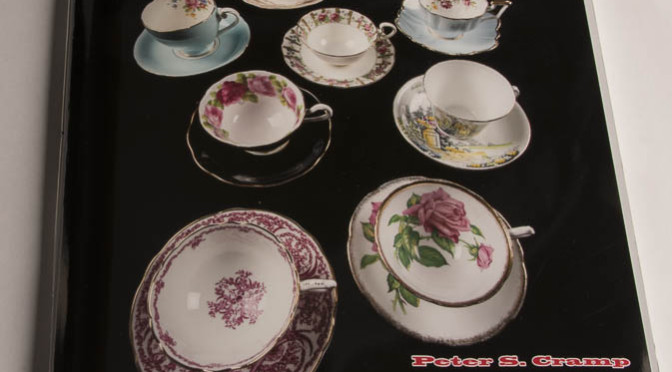
In the last two episodes, we saw how to plan a catalog, and how to shoot the cover of a catalog. Now, I’ll be talking about actually shooting the catalog.
In my blog of April 4, 2016 I noted the shots I would need of each item in the catalog:
- The cup and saucer together as they would look if you were about to use them (the money shot)
- The cup, top and bottom
- A closeup of any noteworthy detail(s) inside the cup
- The rear of the cup, if it was different from the front
- The saucer, top and bottom
- A closeup of the maker’s mark
That works out to between eight and ten images of each set. With 18 different set designs, that works out to at least 144 photographs. So I had to work out some logistics.
To identify each piece as I shot it, I numbered cards sequentially, planning for each saucer to be an odd number, and each cup, an even number. Each set was identified by the odd number. Each cup was placed on its card off to the side. Each saucer was placed with its card on top, and stacked together with the cards as spacers.
I started by shooting just the cups. I mounted my camera with its macro lens over my workbench facing down. On the workbench I
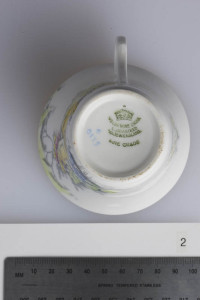
placed a white cutting board because it is softer than the workbench top so there would be less potential for cracking anything if by chance I put it down too hard. I put a piece of tape in the centre of the shot, where I would be putting each cup and eventually each saucer. At the edge of the shot, put a steel ruler (which was less useful than I’d expected), and under the ruler, I slipped the card for each item. In the finished work, the number and the ruler would be cropped out. The number was just to keep me sane. I lit using two strobes with softboxes. One was brighter than the other to reveal any texture to the chinaware.
I photographed each cup from the top, and then I turned the cup over, refocused and shot again. I then repeated the process for the saucers.
Before tearing down this setup, I moved the camera closer and shot the maker’s marks on all of the saucers. I would need these for chapter endings in the final book.
The next setup was the “money shot” setup. These would be the
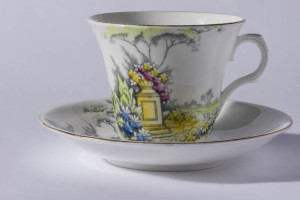
overall shots of the cup and saucer from the front. I used a piece of white seamless for the backdrop (actually, it was a piece of plotter paper I had hanging around). I lit with one strobe with no diffuser in place, with a block of wood covered in white paper for a reflector. These have the virtues of not taking much space and being self-supporting.
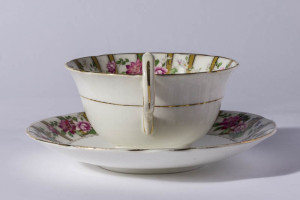
If there was anything of interest on the reverse side, I turned the saucer and cup around and reshot. If there was nothing noteworthy on the other side, I turned them halfway and shot the handle.
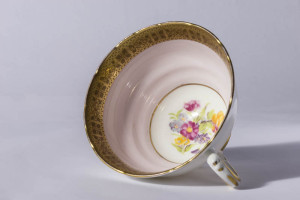
Finally, before moving the camera for the final set of shots, I took the “money shot” for the cup without a saucer, which I mentioned I’d have to do in the first blog of this series.
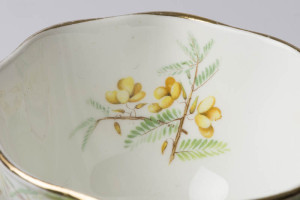
For the final setup, I lifted the camera higher on its tripod so I could see down into the cups at a decent enough angle as to get the details that were on the inside of some of the cups. There were ten of these.
I entered all of the information about each piece into a spreadsheet, including the measurements of height and diameter, and I did some quick research into the company names written on the makers marks. I found some very nice websites that filled in the blanks nicely, and I used that information to populate the catalog in the book. I did some nice finishing details, such as deciding to start the page numbering at the Introduction, and generated the table of contents. After doing a draft copy on my printer, I corrected all of the defects I observed, and was ready to send the contents to the print shop (I used Staples, a national big box stationary store here in Canada). I sent it from home, and very quickly received an email that said it was ready for pickup, jumped in the car and picked it up.
When I got it home, I printed the cover on photographic paper and hand sewed the binding. All in all, it took half a day to plan it, five days to shoot the cover (lots of trial and error), about two days to shoot and process the content. Another day to write the text and insert the photographs, and finally about two hours (including the drive to the store) to print and bind the book. So about a week and a half to complete it.
Now that it’s complete we rather like the catalog. It lets us show off the collection without actually hauling it around with us. Click here if you’d like a PDF copy for your reading pleasure, Of course I’ll be asking for your email address, but I don’t sell your information to anyone else. I’m likely to send you the occasional email, but I promise not to relentlessly spam you. If you don’t live in my service area (within two hours of Barrie, Ontario, Canada), I probably won’t bother you much at all.
This blog is published every Monday at 9:00 am, Eastern Standard Time. If you have comments, questions, or can think of a better approach, feel free to leave a comment. I’ll try to get back to you with a pithy answer.
Feel free to explore the rest of the Artifact Photography (a division of 1350286 Ontario Inc.) website at www.artifactphoto.ca
