Your camera gets dirty. You change lenses in all kinds of conditions and suddenly you notice little abnormalities in the light portions of all of your images. That’s dirt on your camera’s sensor. You notice odd flares on your images. That’s dirt on your lens.
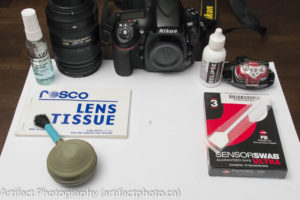
The supplies you are going to need are:
- Lens cleaning solution (anything as long as it can be used on coated lenses).
- Lens tissue (specifically for cleaning lenses).
- Optic cleaning fluid (I suspect it would be okay as lens cleaner as well, but a tad pricey). Ask at your camera store if it’s too strong for your specific camera. Some are formulated for, shall we say, more professional cameras, and some aren’t.
- A head mounted lamp. A desk lamp would do. My studio lamps did the trick, but you don’t always clean in your studio.
- Sensor swabs. They come in several sizes. Type 3 are 24 mm, for full frame DSLRs. Type 2 are 17 mm, for DX-sized DSLRs, and I don’t know what the other types would be.
- Not shown, but useful, are non-abrasive wipes. They are lint-free disposable soft cloths for wiping down the camera body. In a pinch they can also be used as lens tissue.
Cleaning your lens is easy and most people already know how. If you don’t, here’s a quick lesson:
- Find somewhere clean to work. There’s no use getting more dirt in than you take out. You’ll need a table or work surface.
- Grab a blower brush and sweep all over your camera to get loose dust off of it. Make sure you remove the little shield that protects the display on the back of your camera (if you have one) so you can get trapped hair and dust from under it. I have a beard. It’s frightening how much hair gets stuck under there.
- Grab a disposable non-abrasive wipe. Wipe off the built-up dirt the blower brush didn’t get from all over the camera, around the buttons and dials, from the creases and crevices, and the underside of the shield I mentioned in number 2. Wipe dirt off your lens cap, inside and out. Toss the wipe out.
- Look at your lens. Do you see filth, finger prints, for dust? Get a clean wipe or lens tissue. Spray or drop a little lens cleaning fluid on the tissue (never directly on the lens) and wipe the lens. Some folk say only wipe in a straight line from the centre of the lens out, but that’s never worked for me. I go in a circular patterns from the centre of the lens to the edges. This lifts the dirt that collects along the ring off on your tissue. Inspect the lens. If you see more dirt, get a clean tissue, put more cleaner on it and go again. Check the top and underside of any filters, check the front and rear lens on the lens itself, and then check the eyepiece. Quite a lot of goo can collect from your eye, your forehead, and even your eyelashes sometimes hang around.
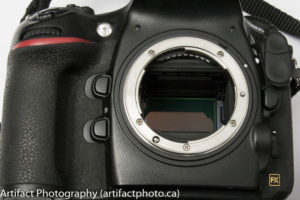
Once you’ve cleaned the outside of your camera, it’s time to tackle the very scary interior. Namely, the sensor. There are some very good articles on the web covering this. I used this one, by Jeff Meyer: http://www.digitalcameraworld.com/2012/05/25/dont-bide-the-dust-a-perfectly-safe-guide-to-sensor-cleaning/.
I use my camera for a bunch of things, both in the studio and out. So, I change lenses a lot. My studio also is used to bind books, so there’s a fair bit of dust to deal with. I also shoot landscapes and nature in the wild, so more dust. I used to take the cameras in for sensor cleaning every six months or so, and I spent a lot of the time between cleanings removing sensor dust spots in Lightroom and Photoshop. The price difference is impressive, but don’t expect the cost to vanish. I used to get my camera sensor done at Vistek for $40 Canadian. I bought Eclipse Optic Cleaning System (fluid) for $18.99 CDN, and a box of 12 Ultraswab 3 cleaning swabs for $64.99 CDN. So the break-even point is two cleanings, and then the next 10 are free, or I’ve taken the cost per cleaning down to $7.00 CDN. Unless I break the camera. Then the cost will go way up. So I’ll be careful. They say steady hands can do it with no problem.
Cleaning the sensor:
- Start with a clean camera exterior in a clean environment (I’m not talking white suits here, but it would help).
-
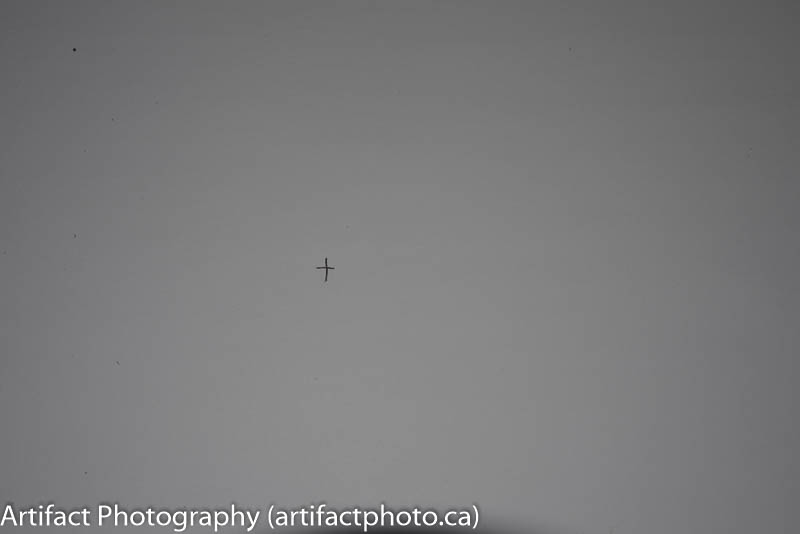
The dark spots are dust and grime on the sensor (mainly on the left side of the photo) Being scientific, we are going to take a baseline photograph first, showing the dust on the sensor. Set the camera to Aperature Priority (A), f-22, and use the popup flash to photograph a piece of white paper. You may need to mark an X on the paper so you have something to focus on.
- As with the exterior, we’re going to do a dry cleaning first. In other words we’re going to blow loose dust out. My camera, a Nikon D800, automatically cleans its sensor when I turn it on or off by shaking the sensor. I suspect that shaken dust is sitting in there just waiting to be blown out.
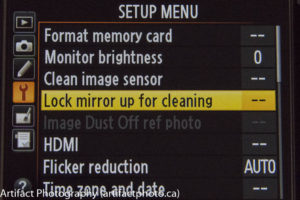
Lock mirror up for cleaning Somewhere in the menu of your camera there is a setting for locking the mirror up for cleaning. On my Nikon it’s under Settings.
- Lock the mirror up and with your blower (brushes removed), blow air onto the sensor without touching it, to remove any large, loose debris. Try to point the camera downward as you blow so the debris doesn’t fall back onto the sensor.
-
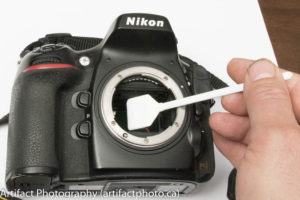
Wipe left to right, then turn over and wipe right to left. Take a fresh swab and drop a couple drops of sensor cleaning solution onto it. Wipe left to right on one side of the swab with a firm, steady hand. When you get to the right side, turn the swab over and swab back from right to left. Switch the camera off to lower the mirror. Toss out the swab.
- Take another photograph of the white sheet of paper to compare the results with your baseline photograph. If there is still gunk, repeat step 5 (it took me three tries to get the big piece of gunk off the upper left corner).
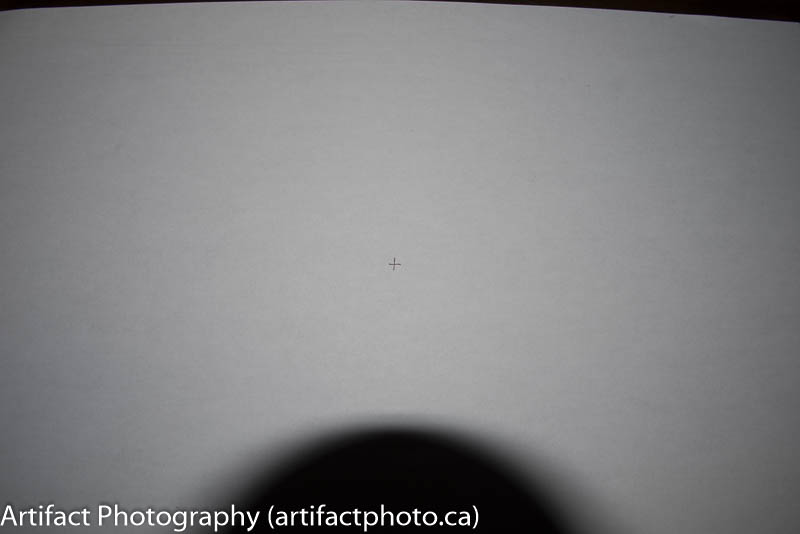
The cleaned sensor
I’d like to thank Jeff Meyer for his well written article: http://www.digitalcameraworld.com/2012/05/25/dont-bide-the-dust-a-perfectly-safe-guide-to-sensor-cleaning/ which I used to learn how to clean my sensor.
This blog is published every Monday at 9:00 am, Eastern Standard Time. If you have comments, questions, or can think of a better approach, feel free to leave a comment. I’ll try to get back to you with a pithy answer.
Feel free to explore the rest of the Artifact Photography (a division of 1350286 Ontario Inc.) website at www.artifactphoto.ca