Shockingly, some people think that if the camera was expensive, it got the colour right. There is a difference between what looks nice and what the colours actually are. The light we are using to make the image comes from various sources, with various colour wavelengths. We are documenting artifacts so we are concerned with ensuring the photograph we end up with exactly reflects the object we are photographing. So the question is, “How do we do that?”
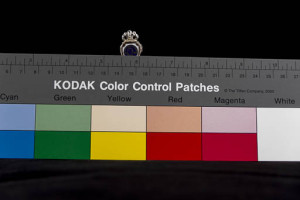
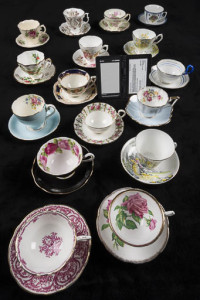
We have to photograph something that we know the colour of, in exactly the same lighting conditions as the image we are photographing. The cheapest way to do this is wander off to the nearest photography store and buy a “grey card” which may or may not be a card, which is certified to be a specific shade of grey. I’ve got several different ones. I started with a “Kodak Color Separation Guide and Gray Scale – Q-14”, which is a paper bar with the different standard colour printed across it and a grey bar. I’ve also got a collapsible grey disk with a white back which can be used as a small reflector when I’m on the road. Lately, I’ve gotten an “x-rite colorchecker passport,” which is a hard plastic wallet about the size of a passport which has a nice grey card protected inside. It also has a “colorchecker” pattern which I’ll discuss later.
Whichever version of grey card you use, when you take the image of the artifact you are photographing, you also take a photograph of the grey card in the same position, under the same lighting conditions. I often just prop it up on the object itself. It is not essential that the grey card be in focus, but I prefer that it is.
When you import the images into Lightroom (I’m assuming you use Lightroom, but if you don’t, whatever you do use should have a similar function (look for colour balance)) the first thing you should do is find th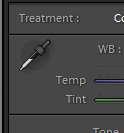 e image of the grey card and edit it in the Develop tab. Under the basic tools, you’ll find “WB” (which means “White Balance”) beside an eye-dropper tool. Select the eye-dropper and hover over the image of the grey card. Click it to select the point you feel most represents grey. Lightroom will automagically set the colour balance to the correct colours.
“But wait,” you say. “How do I apply that colour change to all of the other photographs I’ve taken?” I’m glad you asked.
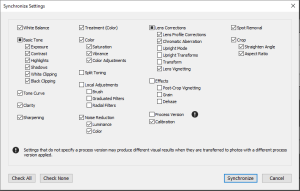
When you return to the Library tab, you’ll find your now colour balanced picture of a grey card is highlighted. If you do a shift-right-
click on the image that you want to colour balance that is furthest away from the grey card image, Lightroom will select all of the pictures 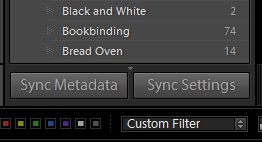 between as well. Down in the bottom right corner of the screen, the “Sync Settings” button will light up. Press it when you are ready, and all of the selected images will take on the same changes as you made to the grey card image. In this case, you’ve only changed the colour balance, but you can also change other features such as shadows, highlights, clarity, lens corrections, etc. I usually select the lens profile corrections, chromatic aberration, and calibration when I do my colour balance. Just remember to select the edited image you want to copy the settings for first, before selecting all of the other images you want to copy the settings to.
Now, this method does an acceptable job of correcting the colour, but if you really want to do the job properly, you can build profiles for each of your cameras to compensate for the way they respond to different lighting conditions. But it costs more.
The x-rite colourchecker passport has that cool pattern I mentioned near the top of this article. Unfortunately, I don’t get a commission if you buy one, but maybe you’ll want to hire me to document your camera collection in gratitude.
When ![]() you buy the colourchecker passport, it comes with a dandy piece of software which builds a profile for your camera, as well as the convenient grey card wallet.
you buy the colourchecker passport, it comes with a dandy piece of software which builds a profile for your camera, as well as the convenient grey card wallet.
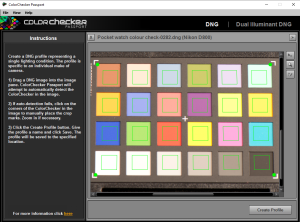
Like the grey card, you take a picture of the colorchecker pattern, but instead of doing the colour balance thing, you open the colorchecker software and drag the DNG image of the colorchecker pattern onto the application and press “Create Profile”.
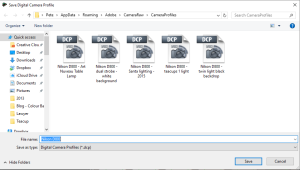
When the profile is created you will have the opportunity to save it. As you can see, I have created several for different lighting conditions. You must shutdown Lightroom and bring it back up, before the profile is available for Lightroom to use it. The profile is not a substitute for the grey card. It just allows Lightroom to know how to properly interpret grey for your particular camera in the specific lighting conditions you are using. You can also build a profile using two different lighting conditions, but I haven’t used it yet.
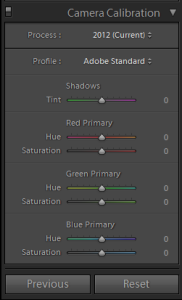
To use the profile, edit the grey card image you used in the first part. Before you colour balance, drop down the control window to “Camera Calibration.” Beside “Profile:” it will probably say “Adobe Standard.” If you select that, a window will pop up with the profile you just created. Select that profile, and then do the colour balance with the eyedropper, and Lightroom will have made subtle changes to the way it interprets grey based on your camera’s actual response to the lighting you used.
This blog is published every Monday at 9:00 am, Eastern Standard Time. If you have comments, questions, or can think of a better approach, feel free to leave a comment. I’ll try to get back to you with a pithy answer.
Feel free to explore the rest of the Artifact Photography (a division of 1350286 Ontario Inc.) website at www.artifactphoto.ca